Web crawler development – Get Started with Scrapy
This blog post uses a simple project to complete the crawling process with Scrapy. Through this process, we can have a general understanding of the basic usage and principle of Scrapy.
1. Preparation
We need to install the Scrapy framework, MongoDB, and PyMongo libraries. If not installed, please refer to their respective official documents.
2. Create project
Create a Scrapy project, the project file can be directly generated with the Scrapy command. The comand is as follows:
scrapy startproject tutorialThis command can be run in any folder. If you are prompted about permissions, you can add sudo to run the command. This command will create a folder named tutorial with the following structure:
scrapy.cfg
tutorial
    __init__.py
    items.py
    middlewares.py
    pipelines.py
    settings.py
    spiders
    __init__.py
3. Create Spider
Spider is a class defined by yourself, which is used by Scrapy to crawl content from web pages and parse the results crawled. However, this class must inherit the spider class scrapy.Spider provided by Scrapy, and also define the name of the spider and the initial request, and how to deal with the results after crawling.
You can also use the command line to create a spider. For example, to generate a spider named Quotes, you can execute the following commands:
cd tutorial
scrapy genspider quotes
Enter the tutorial folder you just created and then execute the genspider command. The first parameter is the name of Spider, and the second parameter is the domain name of website. After execution, there is additional quotes.py in the spiders folder, which is the Spider just created. The content is as follows:
import scrapy

class QuotesSpider(scrapy.Spider):
    name = "quotes"
    allowed_domains = ["quotes.toscrape.com"]
    start_urls = ['http://quotes.toscrape.com/']

    def parse(self, response):
        pass
There are three properties here -- name, allowed_domains and start_urls , and there is also a method parse.
- name, which is the unique name for each project, used to distinguish the different spiders.
- allowed_domains, which is the domain name that is allowed to crawl. If the initial or subsequent request urls are not under this domain name, the request urls will be filtered out.
- start_urls, which contains the list of urls crawled by spider at startup. It defines the initial request.
- parse, it is a method of Spider. By default, when the request formed by the link in start_urls is called and downloaded and executed, the returned response will be passed to this function as the only parameter. This method is responsible for parsing the returned response, extracting data or further generating the request to be processed.
4. Create Item
Item is a container for storing crawling data. Its usage is similar to a dictionary. However, compared to the dictionary, Item has an extra protection mechanism to avoid spelling errors or field definition errors.
To create an Item, you need to inherit the scrapy.Item class and define a field of type scrapy.Field. Observing the target website, we can get text, author, tags.
Define Item, and modify items.py as follows:
import scrapy

class QuoteItem(scrapy.Item):

    text = scrapy.Field()
    author = scrapy.Field()
    tags = scrapy.Field()
Three fields are defined here. and the name of the class is changed to QuoteItem, which we will use this item when crawling.
5. Parse Response
As we saw earlier, the parameter response of the parse() method is the crawling result of the url defined in start_urls. So in the parse () method, we can directly parse the content contained in the response variable, such as browsing the source code of the webpage of the request result, or further analyzing the source code content, or finding the url in the result to get the next request.
We can see that both the results we want and the links to the next page on the webpage. We have to deal with both parts of the content.
The extraction method can be a CSS selector or an XPath selector. Here we use CSS selectors to make selection, the rewrite of parse () method is as follows:
def parse(self, response):
    quotes = response.css('.quote')
    for quote in quotes:
        text = quote.css('.text::text').extract_first()
        author = quote.css('.author::text').extract_first()
        tags = quote.css('.tags .tag::text').extract()
First, we use the selector to select all the quotes and assign them to the quotes variable. Then use the for loop to traverse each quote and parse the contents of each quote.
For text, it is observed that its class is text, so it can be selected with the .text selector. This result is actually the entire node with the tag. To get its body content, you can add :: text to get it. The result at this time is a list of length 1, so you also need to use the extract_first () method to get the first element. For tags, since we want to get all the tags, we can use the extract () method to get the entire list.
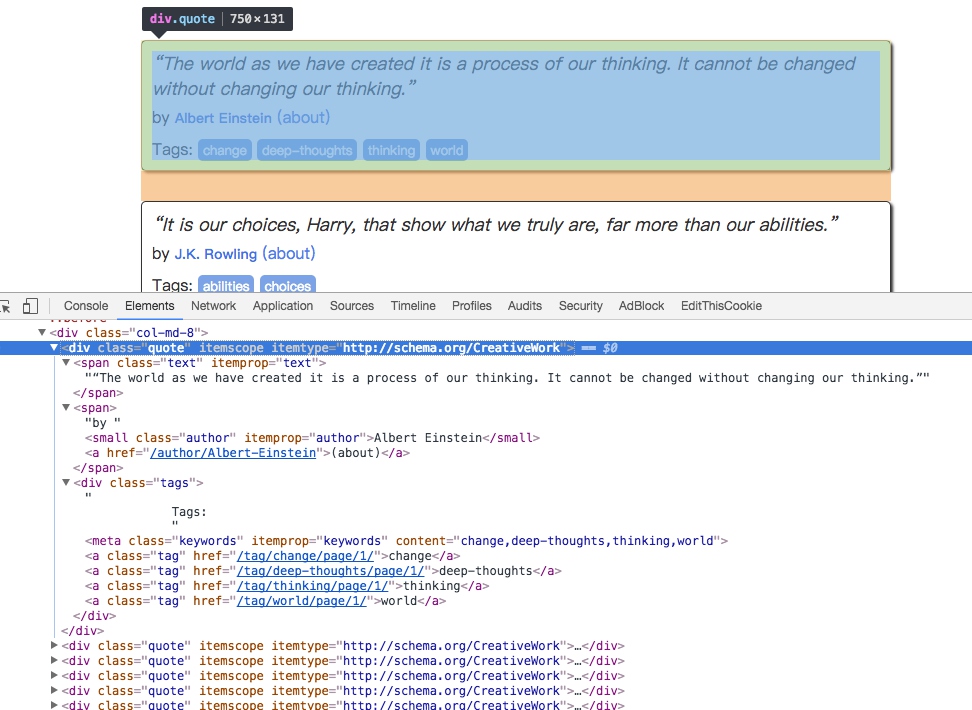
Taking the result of the first quote as an example, the selection methods and results are explained below.
The source code is as follows:
<div class="quote" itemscope=""itemtype="http://schema.org/CreativeWork">
        <span class="text" itemprop="text">“The world as we have created it is a process of our thinking. It cannot be changed without changing our thinking.”</span>
        <span>by <small class="author" itemprop="author">Albert Einstein</small>
        <a href="/author/Albert-Einstein">(about)</a>
        </span>
        <div class="tags">
            Tags:
            <meta class="keywords" itemprop="keywords" content="change,deep-thoughts,thinking,world">
            <a class="tag" href="/tag/change/page/1/">change</a>
            <a class="tag" href="/tag/deep-thoughts/page/1/">deep-thoughts</a>
            <a class="tag" href="/tag/thinking/page/1/">thinking</a>
            <a class="tag" href="/tag/world/page/1/">world</a>
        </div>
    </div>
The return results of different selectors are as follows:
quote.css(‘.text’)

[<Selector xpath="descendant-or-self::*[@class and contains(concat(' ', normalize-space(@class), ' '), ' text ')]"data='<span class="text"itemprop="text">“The '>]

quote.css(‘.text::text’)

[<Selector xpath="descendant-or-self::*[@class and contains(concat(' ', normalize-space(@class), ' '), ' text ')]/text()"data='“The world as we have created it is a pr'>]

quote.css(‘.text’).extract()


['<span class="text"itemprop="text">“The world as we have created it is a process of our thinking. It cannot be changed without changing our thinking.”</span>']

quote.css(‘.text::text’).extract()


['“The world as we have created it is a process of our thinking. It cannot be changed without changing our thinking.”']

quote.css(‘.text::text’).extract_first()

“The world as we have created it is a process of our thinking. It cannot be changed without changing our thinking.”
So, for text, just get the first element of the result, so use the extract_first() method, for tags, to get the list of all the results, use the extract() method.
6. Use Item
Item is defined above, and it will be used next. Item can be understood as a dictionary, but it needs to be instantiated when it is declared. Then assign each field of the Item in turn with the result just parsed, and finally return the Item.
QuotesSpider is rewritten as follows:
import scrapy
from tutorial.items import QuoteItem

class QuotesSpider(scrapy.Spider):
    name = "quotes"
    allowed_domains = ["quotes.toscrape.com"]
    start_urls = ['http://quotes.toscrape.com/']

    def parse(self, response):
        quotes = response.css('.quote')
        for quote in quotes:
            item = QuoteItem()
            item['text'] = quote.css('.text::text').extract_first()
            item['author'] = quote.css('.author::text').extract_first()
            item['tags'] = quote.css('.tags .tag::text').extract()
            yield item
In this way, all the contents of the home page are parsed and assigned as QuoteItems.
7. Subsequent Request
The above operation ahieves the content crawling from the initial page. So, how to crawl the content on the next page? This requires us to find the information from the current page to generate the next request, and then find the information in the next requested page to construct the next request. In this way, it iterates repeatedly to ahcieve crawling of the entire website.
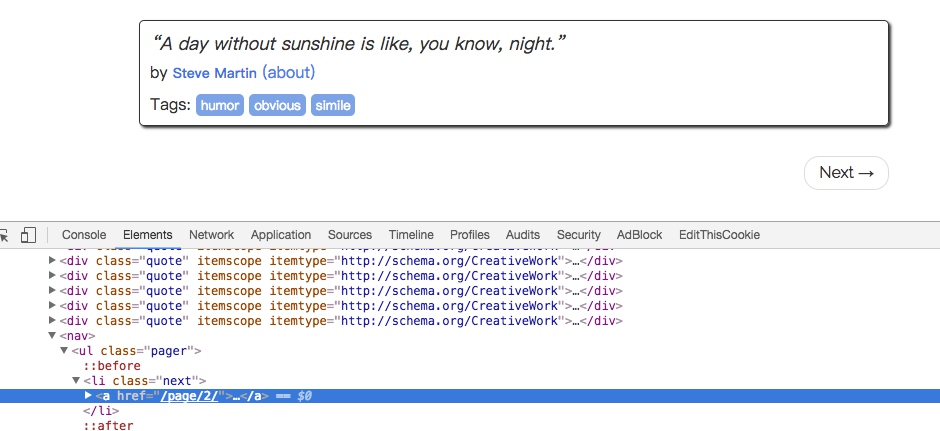
There is a Next button, check the source code, you can find that itts link is /page/2/, in fact the full url is: http://quotes.toscrape.com/page/2, through this url, we can construct the next request.
You need to use the scrapy.Request when constructing a request. Here we pass two parameters -- url and callback, which are described as follows.
- url: it is a request link.
- callback: it is a callback function. When the request that specifies the callback function is completed, a response is obtained, and the engine passes the response as a parameter to the callback function. The callback function parses or generates the next request. The callback function is shown in parse() above.
Since parse() is the method of parsing text, author and tags, and the structure of the next page is the same as the page structure that has just been parsed, we can use parse() to do page parsing again.
The next step we need to do is to use the selector to get the next page link and generate a request, append the following code after the parse() method:
next = response.css('.pager .next a::attr(href)').extract_first()
url = response.urljoin(next)
yield scrapy.Request(url=url, callback=self.parse)
The first sentence of code first get the links to the next page through the CSS selector, that is, to get the href attribute in the a hyperlink. The ::attr(href) operation is used here. Then call the extract_first() method to get the content.
The second sentence of code calls the urljoin() method, which can construct the relative URL into an absolute URL. For example, the address of the next page obtained is /page/2, and the result obtained after the urljoin() method is processeed is: http://quotes.toscrape.com/page/2/.
The third sentence of code constructs a new request through the url and callback variables, and the callback function callback still uses the parse () method. After this request is completed, the response will be processed again by the parse method to get the parsed result of the second page, and then the next page of the second page, which is the third page request. In this way, the crawler enters a loop until the last page.
With a few lines of code, we can easily implement a crawling loop to crawl the results of each page.
Now, the entire Spider class after rewriting is as follows:
import scrapy
from tutorial.items import QuoteItem

class QuotesSpider(scrapy.Spider):
    name = "quotes"
    allowed_domains = ["quotes.toscrape.com"]
    start_urls = ['http://quotes.toscrape.com/']

    def parse(self, response):
        quotes = response.css('.quote')
        for quote in quotes:
            item = QuoteItem()
            item['text'] = quote.css('.text::text').extract_first()
            item['author'] = quote.css('.author::text').extract_first()
            item['tags'] = quote.css('.tags .tag::text').extract()
            yield item

        next = response.css('.pager .next a::attr("href")').extract_first()
        url = response.urljoin(next)
        yield scrapy.Request(url=url, callback=self.parse)
8. Run
Next, enter the directory and run the following command:
scrapy crawl quotesYou can see the crawling results of Scrapy.
2020-04-19 13:37:20 [scrapy.utils.log] INFO: Scrapy 1.3.0 started (bot: tutorial)
2020-04-19 13:37:20 [scrapy.utils.log] INFO: Overridden settings: {'NEWSPIDER_MODULE': 'tutorial.spiders', 'SPIDER_MODULES': ['tutorial.spiders'], 'ROBOTSTXT_OBEY': True, 'BOT_NAME': 'tutorial'}
2020-04-19 13:37:20 [scrapy.middleware] INFO: Enabled extensions:
['scrapy.extensions.logstats.LogStats',
 'scrapy.extensions.telnet.TelnetConsole',
 'scrapy.extensions.corestats.CoreStats']
2020-04-19 13:37:20 [scrapy.middleware] INFO: Enabled downloader middlewares:
['scrapy.downloadermiddlewares.robotstxt.RobotsTxtMiddleware',
 'scrapy.downloadermiddlewares.httpauth.HttpAuthMiddleware',
 'scrapy.downloadermiddlewares.downloadtimeout.DownloadTimeoutMiddleware',
 'scrapy.downloadermiddlewares.defaultheaders.DefaultHeadersMiddleware',
 'scrapy.downloadermiddlewares.useragent.UserAgentMiddleware',
 'scrapy.downloadermiddlewares.retry.RetryMiddleware',
 'scrapy.downloadermiddlewares.redirect.MetaRefreshMiddleware',
 'scrapy.downloadermiddlewares.httpcompression.HttpCompressionMiddleware',
 'scrapy.downloadermiddlewares.redirect.RedirectMiddleware',
 'scrapy.downloadermiddlewares.cookies.CookiesMiddleware',
 'scrapy.downloadermiddlewares.stats.DownloaderStats']
2020-04-19 13:37:20 [scrapy.middleware] INFO: Enabled spider middlewares:
['scrapy.spidermiddlewares.httperror.HttpErrorMiddleware',
 'scrapy.spidermiddlewares.offsite.OffsiteMiddleware',
 'scrapy.spidermiddlewares.referer.RefererMiddleware',
 'scrapy.spidermiddlewares.urllength.UrlLengthMiddleware',
 'scrapy.spidermiddlewares.depth.DepthMiddleware']
2020-04-19 13:37:20 [scrapy.middleware] INFO: Enabled item pipelines:
[]
2020-04-19 13:37:20 [scrapy.core.engine] INFO: Spider opened
2020-04-19 13:37:20 [scrapy.extensions.logstats] INFO: Crawled 0 pages (at 0 pages/min), scraped 0 items (at 0 items/min)
2020-04-19 13:37:20 [scrapy.extensions.telnet] DEBUG: Telnet console listening on 127.0.0.1:6023
2020-04-19 13:37:21 [scrapy.core.engine] DEBUG: Crawled (404) <GET http://quotes.toscrape.com/robots.txt> (referer: None)
2020-04-19 13:37:21 [scrapy.core.engine] DEBUG: Crawled (200) <GET http://quotes.toscrape.com/> (referer: None)
2020-04-19 13:37:21 [scrapy.core.scraper] DEBUG: Scraped from <200 http://quotes.toscrape.com/>
{'author': u'Albert Einstein',
 'tags': [u'change', u'deep-thoughts', u'thinking', u'world'],
 'text': u'u201cThe world as we have created it is a process of our thinking. It cannot be changed without changing our thinking.u201d'}
2020-04-19 13:37:21 [scrapy.core.scraper] DEBUG: Scraped from <200 http://quotes.toscrape.com/>
{'author': u'J.K. Rowling',
 'tags': [u'abilities', u'choices'],
 'text': u'u201cIt is our choices, Harry, that show what we truly are, far more than our abilities.u201d'}
...
2020-04-19 13:37:27 [scrapy.core.engine] INFO: Closing spider (finished)
2020-04-19 13:37:27 [scrapy.statscollectors] INFO: Dumping Scrapy stats:
{'downloader/request_bytes': 2859,
 'downloader/request_count': 11,
 'downloader/request_method_count/GET': 11,
 'downloader/response_bytes': 24871,
 'downloader/response_count': 11,
 'downloader/response_status_count/200': 10,
 'downloader/response_status_count/404': 1,
 'dupefilter/filtered': 1,
 'finish_reason': 'finished',
 'finish_time': datetime.datetime(2020, 4, 19, 5, 37, 27, 227438),
 'item_scraped_count': 100,
 'log_count/DEBUG': 113,
 'log_count/INFO': 7,
 'request_depth_max': 10,
 'response_received_count': 11,
 'scheduler/dequeued': 10,
 'scheduler/dequeued/memory': 10,
 'scheduler/enqueued': 10,
 'scheduler/enqueued/memory': 10,
 'start_time': datetime.datetime(2020, 4, 19, 5, 37, 20, 321557)}
2020-04-19 13:37:27 [scrapy.core.engine] INFO: Spider closed (finished)
This is only a partial running result, some of the middle crawl results have been omitted.
First, Scrapy outputs the current version number and the name of the project being started. Then output some rewritten configurations in current settings.py. Then output the Middlewares and Pipelines as applied previously. Middlewares is enabled by default and can be changed in settings.py. Pipelines are empty by default, which can also be configured in settings.py. They will be explained later.
The next step is to output the crawling results of each page, you can see that the crawler parsing, turning the page, until all the content is crawled, and then terminates.
Finally, Scrapy outputs statistics of the entire crawling process, such as total bytes requested, the number of requests, the number of responses, and the reason for completion, etc.
The entire Scrapy program runs successfully. We have completed the crawling of website's content with very simple code, which is much simpler than writing a little bit of the program.
9. Save to file
After running Scrapy, we only saw the output in the console. What if you want to save the results?
To accomplish this task, no additional code is needed. Feed Exports provided by Scrapy can easily output the crawl results. For example, if we want to save the above results as JSON files, we can execute the following commands:
scrapy crawl quotes -o quotes.jsonAfter the command is run, a quotes.json file is added to the project. The file contains all the content just crawled. The content is in JSON format.
In addition, we can also output a line of JSON for each Item, the output suffix is jl, an abbreviation of jsonline. The command is as follows:
scrapy crawl quotes -o quotes.jlor
scrapy crawl quotes -o quotes.jsonlinesThe output format also supports many types, such as csv, xml, pickle, marshal, etc., and also supports remote output such as ftp, s3, etc. In addition, other outputs can be achieved through customize ItemExporter.
For example, the output corresponding to the following commands are in csv, xml, pickle, marshal format and ftp remote output:
scrapy crawl quotes -o quotes.csv
scrapy crawl quotes -o quotes.xml
scrapy crawl quotes -o quotes.pickle
scrapy crawl quotes -o quotes.marshal
scrapy crawl quotes -o ftp://user:[email protected]/path/to/quotes.csv
Among them, the ftp output needs to correctly configure user name, password, address and output path, otherwise an error will be reported.
Through Feed Exports provided by Scrapy, we can easily output the crawl results to a file. For some small projects, this should be enough. However, if you want more complex output, such as output to the database, we can use Item Pileline to complete.
10. Use Item Pipeline
If you want to do more complex operations, such as saving the results to a MongoDB database or filtering some useful Items, we can define an Item Pipeline to achieve.
Item Pipeline is the project pipeline. When an Item is generated, it will be automatically sent to the Item Pipeline for processing. We usually use the Item Pipeline to do the following operations.
- Clean HTML data
- Verify the crawled data and check the fields to be crawled
- Review and discard duplicate content
- Save the crawled results to database
To implement the Item Pipeline is very simple, you only need to define a class and implement the process_item() method. After the Item Pipeline is enabled, the Item Pipeline will automatically call this method. The process_item() method must return a dictionary or Item object containing data, or throw a DropItem exception.
The process_item() method has two parameters. One parameter is item. and each item generated by Spider will be passed as a parameter. Another parameter is spider, which is an instance of Spider.
Next, we implement an Item Pipeline, filter out Items with a text length greater than 50, and save the results to MongoDB.
Modify the pipelines.py file in the project. The contents of the file automatically generated by the command line can be deleted, and a TextPipeline class can be added. The content is as follows:
class TextPipeline(object):
    def __init__(self):
        self.limit = 50

    def process_item(self, item, spider):
        if item['text']:
            if len(item['text']) > self.limit:
                item['text'] = item['text'][0:self.limit].rstrip() + '...'
            return item
        else:
            return DropItem('Missing Text')
This code defines a limit length of 50 in the constructor, implements the process_item() method, and its parameters are item and spider. First, the method judges whether the item's text attribute exists. If it does not exist, a DropItem exception is thrown; if it exists, then determines whether the length is greater than 50. If it is greater, it truncates and then concatenates the ellipsis, then returns the item.
Next, we will store the processed items into MongoDB and define another Pipeline. Also in pipelines.py, we implement another class MongoPipeline, as shown below:
import pymongo

class MongoPipeline(object):
    def __init__(self, mongo_uri, mongo_db):
        self.mongo_uri = mongo_uri
        self.mongo_db = mongo_db

    @classmethod
    def from_crawler(cls, crawler):
        return cls(mongo_uri=crawler.settings.get('MONGO_URI'),
            mongo_db=crawler.settings.get('MONGO_DB')
        )

    def open_spider(self, spider):
        self.client = pymongo.MongoClient(self.mongo_uri)
        self.db = self.client[self.mongo_db]

    def process_item(self, item, spider):
        name = item.__class__.__name__
        self.db[name].insert(dict(item))
        return item

    def close_spider(self, spider):
        self.client.close()
The MongoPipeline class implements several other methods of the API definition.
- from_crawler, this is a class method, use the @ classmethod identity, is a form of dependency injection, the method of parameter is the crawler, through crawler, we can get the global configuration of each configuration information, in the global configuration settings.py, We can define MONGO_URI and MONGO_DB to specify MongoDB link need to address and the name of the database, to get the configuration information after return to class objects. So the definition of this method is mainly used to get the configuration in settings.py.
- open_spider, this method is called when the Spider is turned on. There are mainly some initialization operations.
- close_Spider. When the Spider is closed, this method will be called to close the database connection.
The main process_item () method does the data insertion.
After defining TextPipeline and MongoPipeline, we need to use them in settings.py. The connection information of MongoDB needs to be defined.
We add the following to settings.py:
ITEM_PIPELINES = {
   'tutorial.pipelines.TextPipeline': 300,
   'tutorial.pipelines.MongoPipeline': 400,
}
MONGO_URI='localhost'
MONGO_DB='tutorial'
Assign the ITEM_PIPELINES dictionary, the name of the key is the Pipeline class name, the key value is the call priority, is a number, the smaller the number is the corresponding Pipeline is called first.
Execute the crawl again, and the command is as follows:
scrapy crawl quotesAfter crawling, a tutorial database and a QuoteItem table are created in MongoDB.
The long text has been processed and appended with ellipses, the short text remains the same, and the author and tags are saved accordingly.
11. Conclusion
We completed a simple introduction to Scrapy by crawling the Quotes website. But this is just the tip of the iceberg, and there's a lot content waiting for us to explore.